Pierce Alert Help

firebuff17

Member
Member
Mar 28, 2011
782
267
CT
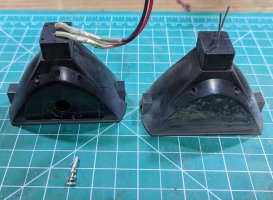
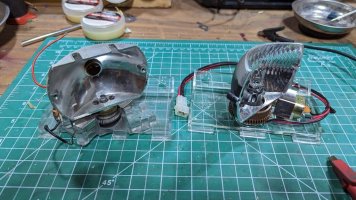
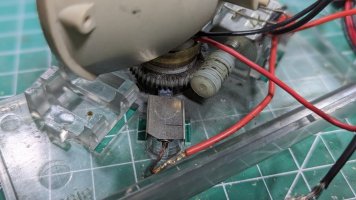
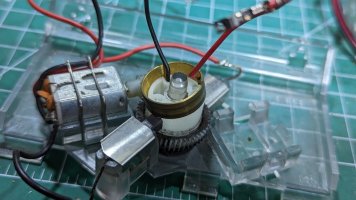
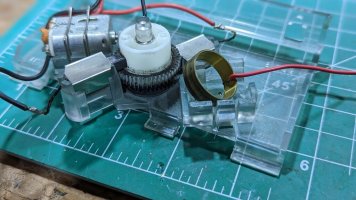
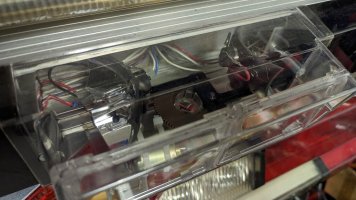
So my pierce alert has the typical heat damaged wiring and also has 1 burned out bulb. I am looking to rebuild it and rewire it.
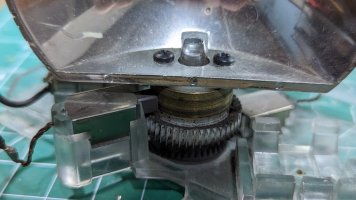
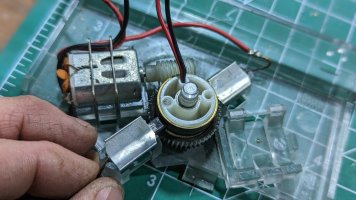
Going to take it apart and polish the lens’ rewire and grease the gears. I have to keep this unique piece in good working order for the display.

The 27 watt bi-pin bulbs with the black tip are hard to find.
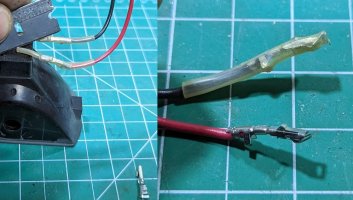
But looking at the wiring it appears the wires have a terminal crimped on the end of the wire to slide over the pin of the bulb. But what throws me off is the terminal looks to have some sort of locking device along with it.
Where can I find these pins?

And any sources of the super flexible wire that is used? Is it 16g silicone covered wire?

There are many knowledgeable people on here but maybe @JohnMarcson has some input.

Thanks
 
The little slide over locking terminals were used on all the "pin out the back' bulbs (early 4x4, brushed style rotators, advantedge alleys etc). The originals aren't easy to track down, but I probably have a few. The silicone covering it can be slid or cut off, it's not really necessary and gets in the way. You can also just twist and solder the wires to the pins if you can't find the connectors. I think the system is just the female internal half of a molex #150 terminal with the bulb pin serving as the male half. I have crimped/soldered female strobe connectors onto the pins too and that has worked fine. As far as the wire I have a spool of flexible marine grade small strad wire I use. The twisting would be the failure point on these even with the flexible wire, but it works way better than rigid thick copper stranded.
 
  • Like
Reactions: firebuff17
I was wondering if the female half of the molex plug would be an appropriate size to just slide over the pin. That’s probably the route I will go.
As far as wire, I knew that regular stranded wire,such as THHN or the like, would be too stiff. I will look around for marine grade that has smaller strands.
Appreciate the help.

I happened to find some very flexible stuff that was used a joints and door jams for accessories on doors of ambulances. It has silver strands and they are super thin. I can't find the name now, but they also use it when wiring mobile radios in this area. It's like 16g or 14g but has tons of tiny silver strands and bends back and forth easily.

The female end of a strobe pin isn't exact, it needs crimped, but it works fine, I also like to solder them, but I'm probably going overkill. I'll grab some pics here in a few minutes of the wire and the connections I have made.

Whelen abandoned their oscillating line because of the failures of the wire even though they used "highly resilient" material. It was just a design flaw; you can't bend ANY wire back and forth thousands of times and expect it to hold up. None the less as as restoration, the more "bendable" the better .
 
  • Like
Reactions: firebuff17
I dug through my crimp connector bin and found some female barrel type crimps. They fit pretty decent without any modification. But when I go to rewire this, I might give the end an ever so slight crimp to tighten up the connection before sliding it over the pin of the bulb.
Also on the wire front, I did some digging deep into the specs of various wire found online. Had to compare the number of strands and diameter of each strand between manufactures. I think I found one that has small diameter strands with a greater number of strands in a 16g diameter.
Heat from the bulbs (especially directly behind the reflector) are definitely a contributing factor to the break down of the insulation of the wire. Thousands of movements does not help the situation either.
The bulk of the disintegration of my wires are right behind the reflector. So I will have to play around with the final placement of the wire. Keep it off the back of the reflector a little bit more but also out of the way of anything to keep it from rubbing.

@JohnMarcson thank you for the help.
 
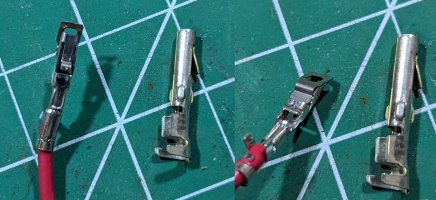
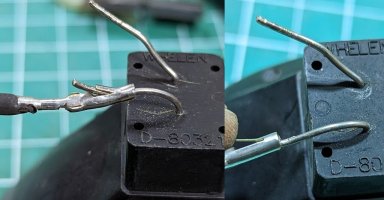
This is what you should have. Keep in mind you can reuse the connectors without the silicone sleeves.

PXL_20230314_162014933.jpg

Here it is exposed.
1c.jpg

Compared to an amp connector
2c.jpg

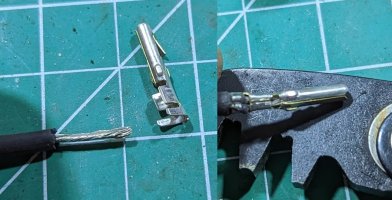
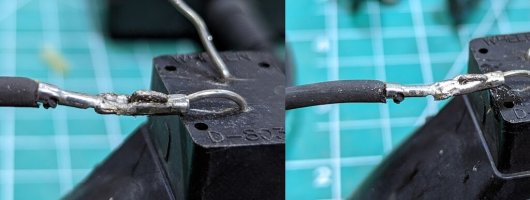
Bendable wire attached to the amp connector
2ef.jpg

Thread the pin in
2d.jpg

Double it back, crimp, add flux, and solder. Or you can not double it back, crimp the connector down and see how tight it is. I always double back and solder.
2f.jpg

Also, I have salvaged the "correct" style connector with very careful removal and crimping. The wires fail from both heat and repeated twisting. I find the breakdown is at the reflectors and in the "tube" going through the assembly.
 
  • Like
Reactions: firebuff17
Thank you for the pics, and descriptions of your process.
Those are the connectors I have on mine. Although there is no silicone sleeves on mine. Probably removed at one point or another for bulb changes.
I like the idea of your female amp connector with bringing it out that side opening, doubling back, and soldering. Might do it that way.
Once I carefully remove the wiring from the housing, I might try your idea of carefully removing the crimp from the old wire to reuse it. If that fails then I will go the amp connector, bending and soldering route.

Thanks for being a sounding board. Started off kinda stumped, got some ideas, then now onto a plan.
 
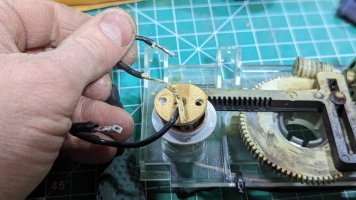
Glad you have a direction to take things. Here are some picture of the failures of Whelen's oscillating products and how their "brushed" rotators avoided theses failures.


Pierce alert "pivot point" wire failures
PXL_20230314_181559843.PORTRAIT.jpgPXL_20230314_181552395.PORTRAIT.jpg

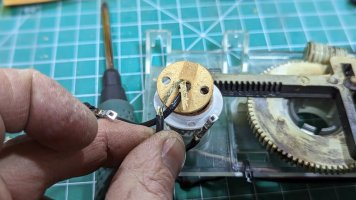
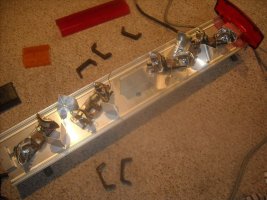
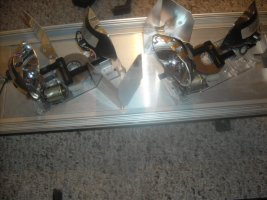
The rotators of the time (during pierce alert production) were first "brushed" where the bulb moved in the reflector like the pierce alert, and then brushless with a stationary bulb.
PXL_20230314_185643574.jpgPXL_20230314_185656881.PORTRAIT.jpgPXL_20230314_185702775.PORTRAIT.jpg


The brushed rotators did fail at the brushes occasionally, but not nearly as fast as the pierce alerts did at the wires. The brushes allowed the bulb and wires to spin without the wires being twisted or themselves spun. Had Whelen used brushes on the oscillating mechanisms I think we could have avoided failures. However, the cost and space of the brushes probably made them not worth the bother.
PXL_20230314_185949933.PORTRAIT.jpgPXL_20230314_190015467.PORTRAIT.jpgPXL_20230314_185917504.PORTRAIT.jpg
 
  • Like
Reactions: tsquale
I can’t wait to disassemble this. Because it may be opening a can of worms.
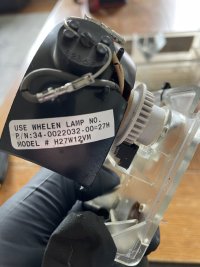
I don’t have it near me today. I have one pic I took for reference of the bulb I need. But my reflectors are different than the ones you show. I wonder which generation I have. Not sure if you can tell from this pic.
 

Attachments

  • FF555D36-8DEC-4D31-BDA9-9D693645435D.jpeg
    FF555D36-8DEC-4D31-BDA9-9D693645435D.jpeg
    108.9 KB · Views: 4
You actually have the same reflectors, I was demonstrating on advantedge alley lights (because I have lots of junk ones) which are close to both the pierce arelt and the oscillating reflector in the advantedge plus bar (but not exact). The pierce alert didn't vary much, it stayed pretty much the same for the period it was made (1995-2008). The biggest differences between different years (aside from custom orders) are smooth or "ribbed" reflectors, whether they have a center mirror, mirrors on the top of the housing (sun shades) and the color of plastic of the gears.

Another fun fact is that the base is actually designed to fit (backwards) in an advantedge plus (flush mount). The assembly was meant to be the oscillating rotator replacement for that bar but a single head unit ended up being used. You could special order a pierce alert (with the reflectors turned around) in an advantedge plus. Also of note the pierce alert with gen 1 advantedge rotators on it is how the OSC advantedge is made.

Normal "mirrors" on top and in the middle version.

PXL_20230314_203317644.jpg

No mirrors
PXL_20230314_203313320.jpg

"backwards" in and advantedge plus
PXL_20230314_203006470.jpg

With Gen 1 advantedge reflectors in an OSC
DSCN1924.jpg
DSCN1928 - Copy.jpg

In a 4000 advantedge plus "backwards"

Single versions
Super 5000 advantedge plus

4000 Advantedge plus
 
Part of me thought that what your pics depicted were not from a pierce alert. But me scrutinizing every pic for as much info I can I noticed it was different.
Mine is smooth reflector, mirror sun shade on top, and the V mirror mounted on top. Good to know that there were not much in changes over its lifespan.
I have watched pretty much all of your vids either on here or YouTube.
I went back and watched your center options for edge and advantedge lightbars, the all traffic clearing lights edge plus, rotating and oscillating components advantedge plus, to name a few, to gather as much as I could from those videos.
I appreciate all the help.
 
  • Like
Reactions: JohnMarcson
Thank you @Ranger-Services.com. I did find the option through you as well. You have a lot of Whelen parts and are a go to for seeing what’s out in the wild.
I found a listing online where the single price was ridiculous but he had multiple so I threw out an offer for 2, and he accepted with free shipping. Now just working on rewiring the heat destroyed wiring.
 
Last edited:
Thank you @Ranger-Services.com. I did find the option through you as well. You have a lot of Whelen parts and are a go to for seeing what’s out in the wild.
I found a listing online where the single price was ridiculous but he had multiple so I threw out an offer for 2, and he accepted with free shipping. Now just working on rewiring the heat destroyed wiring.
Replace wire even if it looks ok. Mine was twisted to death internally way below where the heat damage was. I just did all new flexible wire and found some of the right connections in my bin, but I had already done the amp connection trick so I left it. Good luck, post your results.
 
  • Like
Reactions: firebuff17
@JohnMarcson
I planned on replacing all the wire in the pierce alert housing. It’s all toast. I am surprised it didn’t short out after pulling the housing off the bar and looking at it. I have fired it up a few times previous to pulling it out and was shocked at how bad the wiring was fried.
I ordered some 16g flexible wire that I found. Started to take it apart to re-wire it, and found out that the OD of two cables is too big for the routing through the base. So I will have to find some 18g that matches the flexibility. I will be sure to take some pics and post results. No promise as to how long that will be.
 
  • Like
Reactions: JohnMarcson
@JohnMarcson
I planned on replacing all the wire in the pierce alert housing. It’s all toast. I am surprised it didn’t short out after pulling the housing off the bar and looking at it. I have fired it up a few times previous to pulling it out and was shocked at how bad the wiring was fried.
I ordered some 16g flexible wire that I found. Started to take it apart to re-wire it, and found out that the OD of two cables is too big for the routing through the base. So I will have to find some 18g that matches the flexibility. I will be sure to take some pics and post results. No promise as to how long that will be.
Good to know on the wire size. I have one more to rebuild. I have several that are all clear, 1 black housing with red and clear windows, 1 all blue, and 1 all amber. I wish the windows could be swapped safety, I would love a blue housing clear windows. I would also like to get my hands on a red housing. Please post your progress.
 
  • Like
Reactions: firebuff17
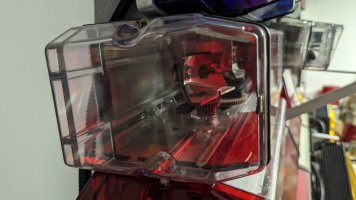
I would love some colored housings or colored front windows. But looking at the front windows, they don’t look like they will come out easily. So cleaning/polishing is going to be a pain, let alone swapping lens’.
 
I would love some colored housings or colored front windows. But looking at the front windows, they don’t look like they will come out easily. So cleaning/polishing is going to be a pain, let alone swapping lens’.
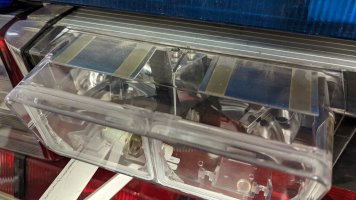
The housing is the same as the piercer strobe, just transparent so there are plastic pieces that the 3x4 strobes would mount to that do nothing on the pierce alert. They make it really hard to clean. I got piercer strobe with the lenses loose, as if the glue didn't take or something, I looked all over for colored windows and didn;t find any. I considered using edge alley light cutouts (colored ones are sometimes used in caps with an alley cutout for some reason, but the optics are different.
 
  • Like
Reactions: firebuff17

Forum Statistics

Threads
54,801
Messages
453,247
Members
19,559
Latest member
shawn1