2016 Ford Explorer XLT Install


Part List
Brain-
-Whelen CenCom Gold
-Whelen Howler
Front-
-Fog Lights - Feniex Cannon 120 Red/White
-Grill - Feniex Apollo 600 Red/White w/ Take Down Option
-Dash - Whelen SlimLighter Red/White with quick disconnect
Side-
-Licence Plate - SoundOff Ghosts Flush Mount Red/White
Rear
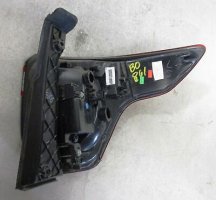
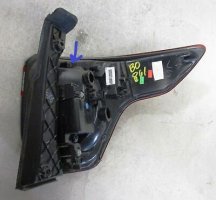
-Back Up Tail Light - 2 Feniex Cannon 120 Red/Blue
-Turn Signal Tail Light - 2 Feniex Cannon 120 Red/Blue
Brain
The Howler, Cencom Gold controller, and fuse block were mounted to a piece of wood that was cut to fit under the drivers seat. Wires were run along the drivers side floor board to the front and rear.


Front
The Whelen Howler was installed inside of the drivers side fender with 2013 Ford Explorer utility mount. The mounting bracket lines up perfectly with the chassis No drilling required. For those that have fog lights ONLY 1 HOWLER SPEAKER CAN BE USED.
2016 Ford Front bumper removal:
-Remove all the screws on the top of the bumper cover

-Remove the screws in the wheel well

-here comes the tricky part. there are the bumper has 3 hidden screws that can only be accessed from behind the wheel well.

Apollo Install
-L bracket pushed all the way back on top of the front bumper.


REAR
Part List
Brain-
-Whelen CenCom Gold
-Whelen Howler
Front-
-Fog Lights - Feniex Cannon 120 Red/White
-Grill - Feniex Apollo 600 Red/White w/ Take Down Option
-Dash - Whelen SlimLighter Red/White with quick disconnect
Side-
-Licence Plate - SoundOff Ghosts Flush Mount Red/White
Rear
-Back Up Tail Light - 2 Feniex Cannon 120 Red/Blue
-Turn Signal Tail Light - 2 Feniex Cannon 120 Red/Blue
Brain
The Howler, Cencom Gold controller, and fuse block were mounted to a piece of wood that was cut to fit under the drivers seat. Wires were run along the drivers side floor board to the front and rear.
Front
The Whelen Howler was installed inside of the drivers side fender with 2013 Ford Explorer utility mount. The mounting bracket lines up perfectly with the chassis No drilling required. For those that have fog lights ONLY 1 HOWLER SPEAKER CAN BE USED.
2016 Ford Front bumper removal:
-Remove all the screws on the top of the bumper cover
-Remove the screws in the wheel well
-here comes the tricky part. there are the bumper has 3 hidden screws that can only be accessed from behind the wheel well.
Apollo Install
-L bracket pushed all the way back on top of the front bumper.
REAR
Attachments
-
 76093_25dc35f24f253f7be503a279ca55a7db_thumb.jpg6.4 KB · Views: 539
 -
 76089_3e8e0cd8556d97052eac1a52a5fc43de_thumb.jpg8.1 KB · Views: 533
 -
 76090_8216d5d6bcac7b668672b72b06e32fca_thumb.jpg6.6 KB · Views: 521
 -
 Front Bumper Screws.jpg152.1 KB · Views: 531
 -
 front top scews.jpg150.2 KB · Views: 519
 -
 wheel well screws.jpg145.4 KB · Views: 517
 -
 20160306_174019.jpg111.2 KB · Views: 500
 -
 20160306_174021.jpg115.2 KB · Views: 487
 -
 76090_8216d5d6bcac7b668672b72b06e32fca_thumb.jpg6.6 KB · Views: 505
 -
 76093_25dc35f24f253f7be503a279ca55a7db_thumb.jpg6.4 KB · Views: 471
 -
 20160306_174019.jpg111.2 KB · Views: 348